I am happy to announce that from today the development release of ModelConverterX supports the glTF format as used by the new MSFS. With this addition I have also changed the version number of the development release to 1.5.
You can now read glTF files and the MSFS BGL files that contain the object models into ModelConverterX. When reading the BGL files that have been generated by the package tool of MSFS ModelConverterX will show the texture mapping incorrectly, that’s because MSFS stores the texture coordinates in a non-standard way. I hope to figure that out later.
You can also export models in the glTF format, so that you can include them in your scenery package. At the moment the exporting is limited to static objects, so you can export the geometry, material settings, levels of details and lights. Other features like animations, mouse rectangles or visibility conditions are planned to be added later.
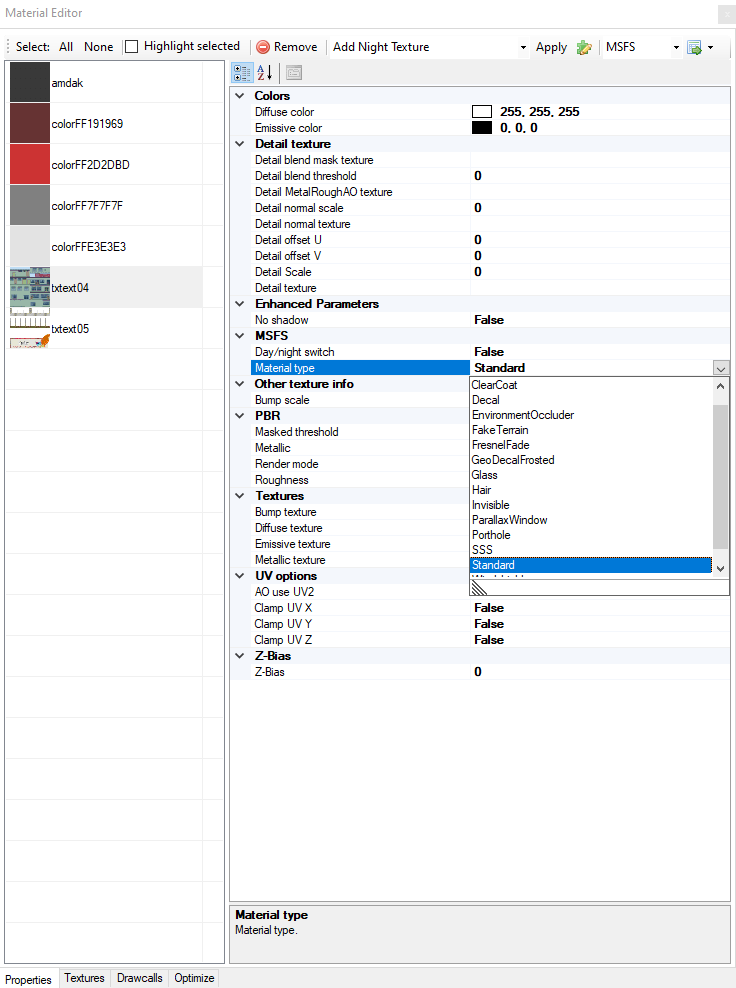
In the material editor you can select MSFS now as a filter as well. That will only show the material settings relevant for MSFS. I have mapped the material attributes on the already available ones where possible, to each conversion from older formats to MSFS. But this also means that the names are sometimes slightly different from what the MSFS SDK uses. I plan to update the help texts to clarify this more. For some of the more exotic material types in MSFS not all attributes are implemented. Those will be added later.
At the moment I am not sure if ModelConverterX should call the package tool for MSFS directly, as the package tool typically makes all BGL files of the package, while ModelConverterX is now designed to only make a single BGL file. So for the moment I think it is better to export a glTF file and then create the package from inside MSFS. But if there are suggestions on an easier workflow, let me know.
As can be seen from all the details above, the glTF support is not yet finished. And I’ll continue to add more features. So please let me know if you encounter any issues while using it.